Have you ever missed the smell of fresh bread baking in the oven? For many people who cannot eat gluten, walking past a bakery can feel a bit sad. You might remember the crunch of a warm french roll or the soft inside of a dinner bun. Many gluten-free breads you buy at the store can feel like bricks, or they crumble into tiny pieces the moment you try to spread butter on them.
It does not have to be that way anymore. You deserve to eat bread that tastes amazing and feels like the real thing. This recipe will show you how to make rolls that have a deeply golden, shatteringly crispy crust and a pillowy, soft inside. Your kitchen will smell like a professional bakery, and no one will guess these rolls are completely gluten-free.
This recipe is designed to bring the joy of artisanal baking back into your kitchen without any complicated steps. What makes these Gluten-Free Artisan Rolls special is the incredible texture. By using a specific blend of gluten-free flours and a magic ingredient called psyllium husk, we can copy the stretchy texture of traditional wheat dough.
- Difficulty Level: Medium. While it requires some patience for the dough to rise, the hands-on work is very simple and requires no heavy kneading.
- Time Required: 20 minutes of prep time, 2 hours for rising, and 30 minutes of baking time.
- Safety Note: This recipe is 100% gluten-free. It is safe for individuals with celiac disease, wheat allergies, or non-celiac gluten sensitivity.
Essential Gluten-Free Artisan Rolls Ingredients
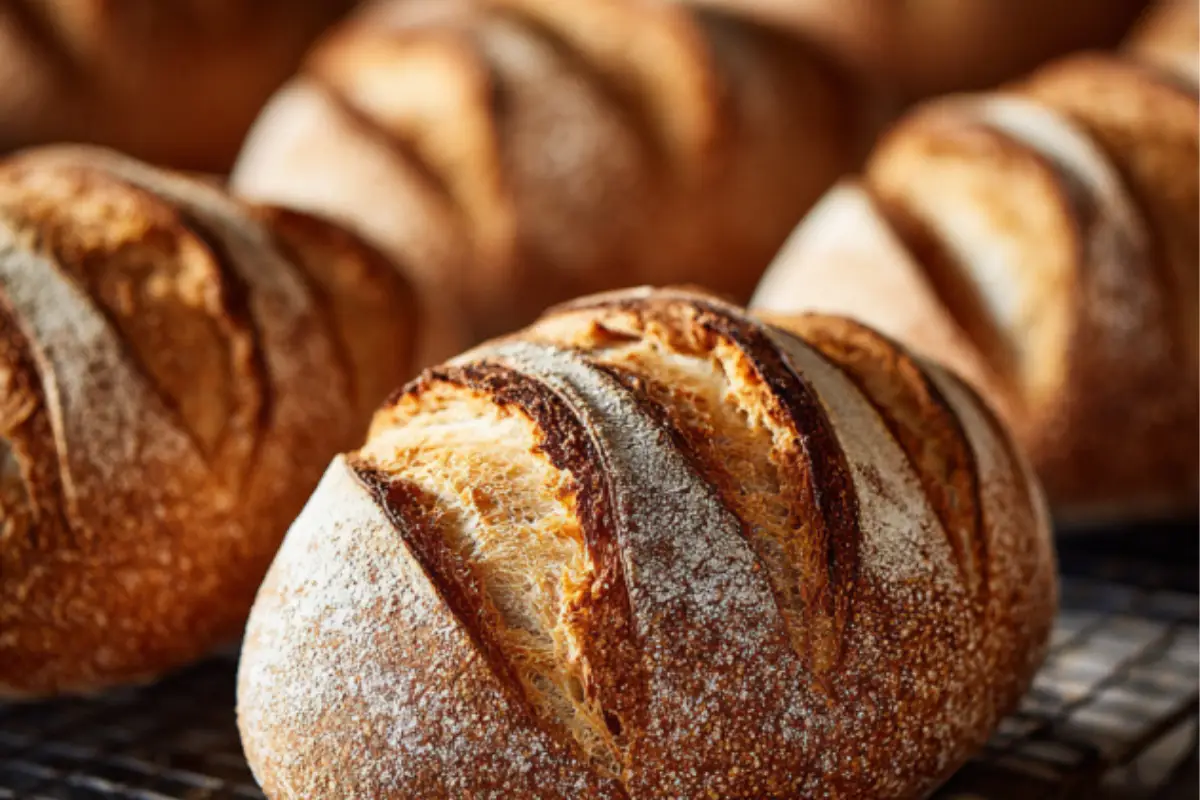
To get the perfect bakery style look shown in jf.png, using the right ingredients is very important. Gluten-free baking is a science, so changing ingredients can alter how the bread rises.
- Millet Flour (150 grams / about 1 and 1/4 cups): This flour gives the bread a beautiful golden color and a mild, slightly nutty flavor that mimics traditional wheat.
- Tapioca Starch (150 grams / about 1 and 1/4 cups): Also known as tapioca flour, this starch gives the rolls their chewy texture and helps the crust get incredibly crispy.
- Sorghum Flour (100 grams / about 3/4 cup): This flour adds structure to the bread so it does not collapse in the oven.
- Whole Psyllium Husk (25 grams / about 3 tablespoons): This is the most critical ingredient. Do not use powder. Whole psyllium husk absorbs water and creates a gel that holds the gas bubbles from the yeast, allowing the bread to rise.
- Instant Dry Yeast (9 grams / 1 packet): This makes the dough rise and creates the airy pockets inside the rolls.
- Fine Sea Salt (10 grams / 1.5 teaspoons): Salt gives the bread its classic savory flavor. Do not skip it, or the bread will taste flat.
- Warm Water (400 milliliters / about 1 and 2/3 cups): The water should feel like warm bath water, around 105 degrees Fahrenheit. If it is too hot, it will kill the yeast. If it is too cold, the yeast will not wake up.
- Honey or Maple Syrup (15 grams / 1 tablespoon): This feeds the yeast to help it activate quickly and aids in browning the crust.
Shopping Tips
Always look for labels that say certified gluten-free on your flour packages. Facilities that process wheat can leave traces of gluten on equipment, which can make sensitive people sick.
Dietary Variations
- Vegan Option: Use maple syrup or organic sugar instead of honey.
- Garlic Herb Variation: Mix in 1 teaspoon of garlic powder and 1 tablespoon of dried rosemary to the dry ingredients for a savory twist.
Step-by-Step Instructions
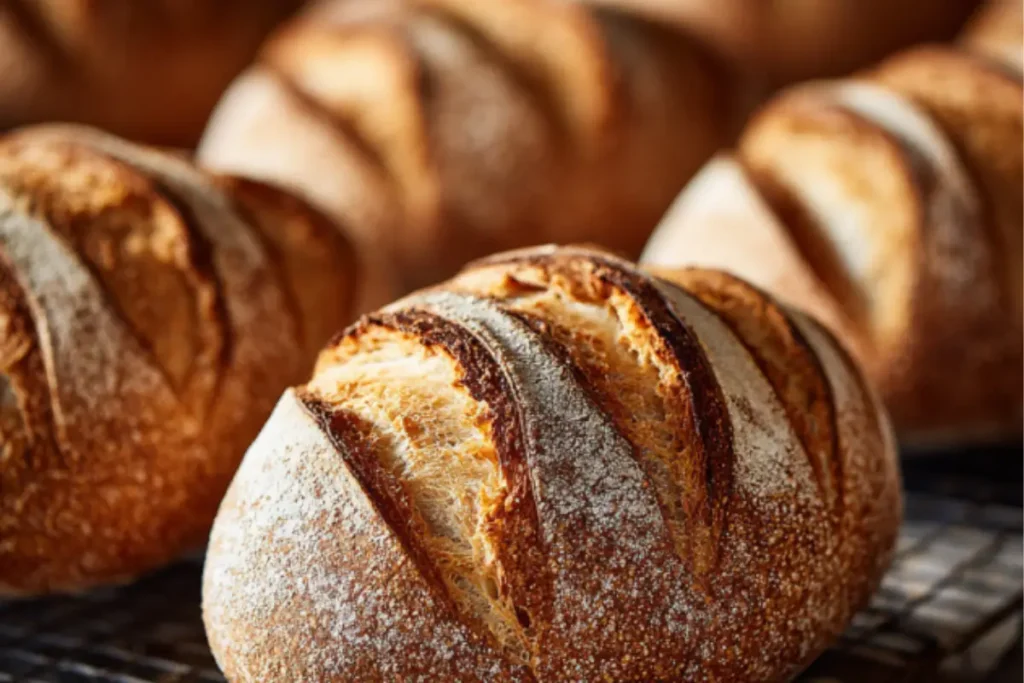
Follow these steps carefully to achieve the beautiful, blistered crust seen in the jf.png image.
- Activate the Psyllium Gel: In a medium bowl, pour the 400 milliliters of warm water. Stir in the 15 grams of honey and the 25 grams of whole psyllium husk. Let it sit for 10 minutes. It will turn into a thick, jelly-like paste.
- Mix the Dry Ingredients: In a large mixing bowl, whisk together the 150 grams of millet flour, 150 grams of tapioca starch, 100 grams of sorghum flour, 9 grams of instant dry yeast, and 10 grams of sea salt. Make sure there are no lumps.
- Combine to Form Dough: Pour the psyllium gel into the bowl with the dry ingredients. Use a sturdy wooden spoon or your hands to mix everything together. Keep mixing until all the flour is hydrated and a soft dough forms. It will feel much wetter and stickier than regular wheat dough, which is completely normal.
- The First Rise: Shape the dough into a single large ball inside the bowl. Cover the bowl tightly with plastic wrap or a damp kitchen towel. Place it in a warm, draft-free spot for 1.5 hours to 2 hours. The dough should double in size.
- Shape the Rolls: Turn the risen dough out onto a clean surface lightly dusted with tapioca starch. Divide the dough into 6 equal pieces. Gently shape each piece into an oval roll, similar to the shape of the rolls in jf.png.
- The Second Rise: Place the shaped rolls onto a baking sheet lined with parchment paper. Cover them gently with a light cloth and let them rest for 30 minutes while you preheat your oven.
- Preheat and Add Steam: Preheat your oven to 450 degrees Fahrenheit. For the crispiest crust, place an empty metal baking pan on the bottom rack of the oven while it heats up.
- Score the Dough: Just before baking, use a very sharp knife or a razor blade to cut a deep slash down the center of each roll. This lets steam escape so the rolls expand beautifully without cracking at the bottom.
- Bake: Place the baking sheet with the rolls on the middle rack. Carefully pour 1 cup of cold water into the hot metal pan on the bottom rack and quickly close the oven door. The steam created by the water will trap moisture on the dough, allowing the crust to get ultra-crispy. Bake for 30 to 35 minutes until the rolls are a deep golden brown.
- Cool completely: Transfer the rolls to a wire cooling rack. You must let them cool for at least 1 hour before cutting into them. If you cut them while they are hot, the inside will feel gummy.
Assembly and Serving Suggestions
These Gluten-Free Artisan Rolls are best served slightly warm or at room temperature on the day they are baked.
- The Classic Table Presentation: Arrange the rolls in a napkin-lined basket to keep them warm. Serve them alongside high-quality salted butter, olive oil mixed with balsamic vinegar, or warm honey.
- Meal Pairings: These rolls are sturdy enough to scoop up thick soups and stews. They pair beautifully with a hot bowl of tomato basil soup or a hearty beef stew. You can also slice them in half to make gourmet mini sliders or breakfast sandwiches with eggs and avocado.
Storage and Make-Ahead Tips
Gluten-free bread dries out faster than regular bread because it lacks gluten to lock in moisture. Proper storage will keep your rolls tasting fresh.
- Room Temperature: Store leftover rolls in a paper bag for up to 2 days. Do not store them in a plastic bag, or the crispy crust will become soft and soggy.
- Freezing: This is the best way to keep your bread fresh long-term. Let the rolls cool completely. Slice them in half, wrap them tightly in plastic wrap, and place them in a freezer-safe zip-top bag. They will keep well for up to 3 months.
- Reheating: To get that signature jf.png crunch back, reheat frozen or stale rolls in an oven or air fryer at 350 degrees Fahrenheit for 5 to 8 minutes. Avoid using the microwave, as it will make the bread rubbery.
Recipe Variations
- Everyday Sandwich Buns: Instead of shaping the dough into ovals, shape them into flat, round discs. Sprinkle sesame seeds on top before baking to create allergen-friendly hamburger buns.
- Sweet Cinnamon Raisin Rolls: Add 2 tablespoons of sugar, 1 teaspoon of cinnamon, and 50 grams of raisins to the dry ingredients. Serve these warm with a smear of cream cheese.
- Cheesy Italian Rolls: Knead 50 grams of dairy-free or regular parmesan cheese and 1 teaspoon of Italian seasoning into the dough during the shaping step.
Conclusion
Baking your own gluten-free bread can feel intimidating, but this recipe proves that you can get bakery-quality results right at home. You do not have to settle for dry, store-bought options when you can have fresh, crackly rolls straight from your own oven.
Give this recipe a try, and do not forget to look closely at jf.png to see exactly how beautifully golden your rolls should look when they finish baking. Please leave a comment below to share how your rolls turned out or tell us your favorite way to eat them.
FAQs Section
Can I use oat flour or almond flour instead of the flours listed?
No, it is best not to swap the flours in this specific recipe. Millet and sorghum flours provide the perfect weight and structure, while tapioca starch creates the crispy crust and chewy texture. Almond flour contains too much fat and will make the rolls dense and heavy, preventing them from rising like the ones in jf.png.
How do I keep my gluten-free bread from crumbling?
The whole psyllium husk in this recipe acts as a substitute for gluten. It creates a strong network that traps moisture and air, which keeps the rolls together. Measuring your ingredients carefully with a kitchen scale also prevents the dough from becoming too dry and crumbly.
What are the health benefits of making these rolls at home?
By baking these rolls yourself, you avoid the artificial preservatives, extra sugars, and thickeners found in many store-bought gluten-free items. Sorghum and millet are whole grains that provide natural fiber, iron, and B vitamins, making these rolls a nutritious option for your daily meals.