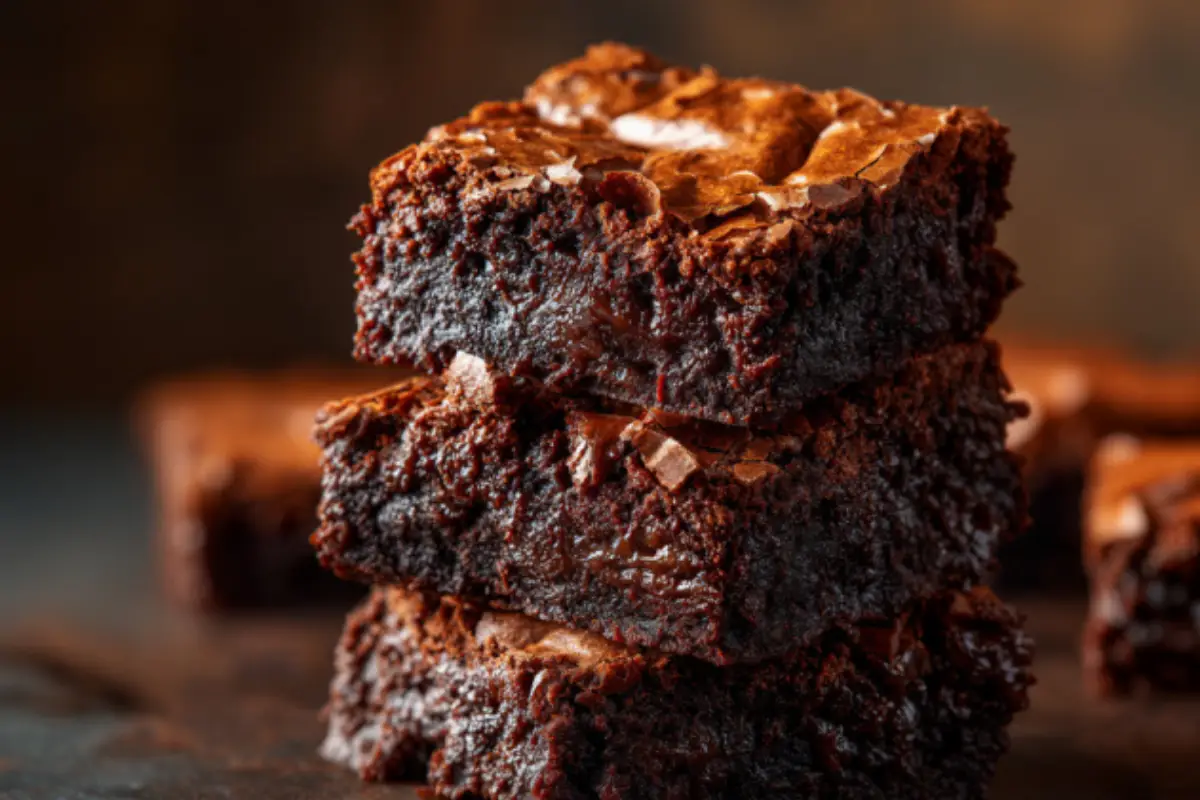
Have you ever missed the deep satisfaction of biting into a rich, chewy brownie that completely melts in your mouth? Finding a gluten-free dessert that actually satisfies your chocolate cravings can be hard. Many gluten-free baked goods turn out dry, crumbly, or gritty. It can feel like you have to give up your favorite comfort foods just to stay healthy and feel good.
You do not have to settle for second-rate treats anymore. This recipe gives you the ultimate chocolate experience without any of the gluten. These brownies are just as thick, fudgy, and decadent as the traditional ones you remember. In fact, they are so good that your family and friends will never guess they are completely gluten-free. Get ready to bake a dessert that brings joy back to your kitchen.
Overview
This recipe is a true game-changer for gluten-free baking because it relies on simple ingredients to create a perfect texture. Instead of using complex flour blends that can leave a chalky aftertaste, this recipe uses almond flour. Almond flour holds onto moisture beautifully, which is the secret to getting that dense, fudgy center and a shiny, crinkly top crust.
- Prep Time: 15 minutes
- Bake Time: 25 minutes
- Total Time: 40 minutes
- Difficulty Level: Easy
- Dietary Safety: 100% gluten-free and safe for celiac disease or gluten sensitivities
Essential Gluten-Free Ingredients
Using the right ingredients ensures your brownies turn out perfectly safe and delicious. Always look for labels that state “certified gluten-free” to prevent any accidental exposure to gluten.
Main Ingredients
- Almond Flour: 1 cup (super-fine, blanched almond flour works best for a smooth texture)
- Unsweetened Cocoa Powder: 3/4 cup (look for a high-quality cocoa powder to get a deep flavor)
- Granulated Sugar: 1 cup
- Brown Sugar: 1/2 cup (packed tightly to add moisture and chewiness)
- Unsalted Butter: 1/2 cup (melted and cooled slightly)
- Eggs: 3 large eggs (at room temperature so they mix smoothly)
- Chocolate Chips: 1/2 cup (certified gluten-free semi-sweet or dark chocolate chips)
- Vanilla Extract: 1 teaspoon (pure vanilla extract adds a warm aroma)
- Salt: 1/4 teaspoon (helps balance the sweetness and brings out the chocolate taste)
Ingredient Variations
- Dairy-Free Option: Use 1/2 cup of melted coconut oil or dairy-free stick butter instead of dairy butter. Ensure your chocolate chips are dairy-free as well.
- Nut-Free Option: If you cannot have almonds, you can substitute the almond flour with 1 cup of a 1-to-1 gluten-free baking flour blend that contains xanthan gum.
- Extra Texture: Stir in 1/2 cup of chopped walnuts or pecans if you enjoy a crunchy element in your brownies.
Step-by-Step Instructions
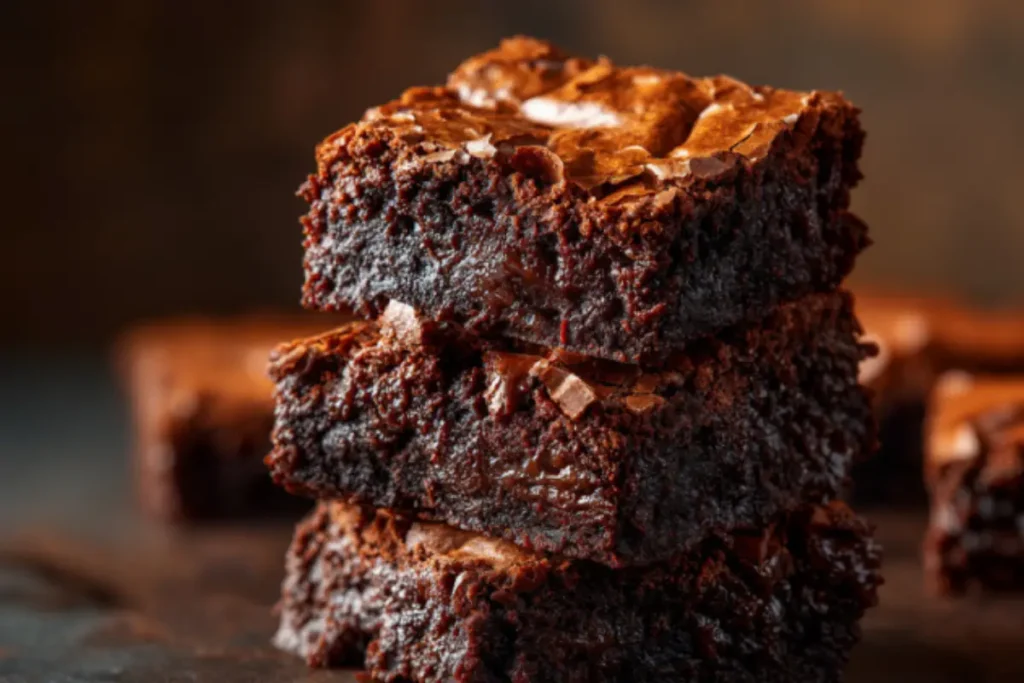
Follow these simple steps to bake your batch of brownies. Taking care during preparation helps guarantee a safe environment and a wonderful result.
1. Prep the Kitchen
Preheat your oven to 350 degrees Fahrenheit. Line an 8-inch by 8-inch baking pan with parchment paper. Leave a little extra paper hanging over the edges. This acts as a sling to help you lift the brownies out safely later. If you share a kitchen with gluten eaters, wipe down your counters and use clean utensils to avoid cross-contamination.
2. Mix the Wet Ingredients
In a large mixing bowl, combine 1/2 cup of melted unsalted butter, 1 cup of granulated sugar, and 1/2 cup of packed brown sugar. Whisk the mixture thoroughly. Add the 3 large eggs one at a time, whisking well after each addition. Stir in 1 teaspoon of vanilla extract. Whisk the entire mixture for about two full minutes until it becomes slightly pale and smooth. This step helps create that beautiful shiny crust on top.
3. Sift and Add Dry Ingredients
In a separate bowl, stir together 1 cup of almond flour, 3/4 cup of unsweetened cocoa powder, and 1/4 teaspoon of salt. Gently fold these dry ingredients into your wet mixture using a spatula. Mix just until the ingredients are combined and you no longer see pockets of flour. Gluten-free batter does not get tough from mixing like wheat flour does, but keeping it gentle keeps the texture right.
4. Fold in Chocolate Chips
Gently stir 1/2 cup of gluten-free chocolate chips into the batter. This adds pockets of melted chocolate throughout the finished brownies.
5. Bake to Perfection
Spread the thick batter evenly into your prepared 8-inch baking pan. Use the back of a spoon or a spatula to smooth out the top surface. Place the pan in the center rack of your preheated oven. Bake for 25 minutes.
6. The Doneness Test
To check if the brownies are ready, insert a toothpick into the center. For a fudgy texture, the toothpick should come out with a few moist crumbs attached. It should not be covered in wet batter. If it comes out completely clean, take them out immediately so they do not dry out.
7. Cool Completely
Remove the pan from the oven and set it on a cooling rack. Let the brownies cool completely in the pan for at least 30 minutes. This cooling time is essential because gluten-free baked goods need time to firm up as they cool. If you cut them while they are hot, they might crumble apart.
Assembly or Serving Suggestions
Once the brownies are completely cool, use the parchment paper handles to lift the entire block out of the pan. Place it on a cutting board. Use a sharp, clean knife to cut the block into 16 squares. To get very clean slices, wipe your knife with a warm, damp paper towel between each cut.
- The Ultimate Dessert: Serve a warm brownie square with a scoop of certified gluten-free vanilla bean ice cream.
- A Cozy Afternoon Treat: Pair a brownie with a hot cup of coffee, dark tea, or a cold glass of milk.
- Party Style: Arrange the brownie squares on a nice serving platter and dust the tops lightly with extra cocoa powder or powdered sugar for an elegant look.
Storage & Make-Ahead Tips
Gluten-free baked goods can sometimes dry out faster than traditional treats, but these brownies stay moist for days thanks to the almond flour.
- Room Temperature: Store your brownie squares in an airtight container at room temperature for up to 3 days. Place a piece of parchment paper between layers so they do not stick together.
- Refrigeration: You can keep them in the refrigerator for up to 5 days. This actually makes them extra dense and chewy.
- Freezing: Wrap individual brownie squares tightly in plastic wrap, then place them inside a heavy-duty freezer bag. They can be frozen for up to 3 months.
- Reheating: To enjoy a warm brownie, thaw it at room temperature or remove the plastic wrap and microwave it for 10 to 15 seconds. This softens the chocolate chips and makes the center gooey again.
Recipe Variations
- Make it Mocha: Add 1 teaspoon of instant espresso powder to the dry ingredients. Coffee naturally amplifies the rich taste of chocolate.
- Peanut Butter Swirl: Drop small spoonfuls of smooth peanut butter onto the top of the brownie batter before baking. Use a butter knife to gently swirl the peanut butter through the top layer.
- Salted Caramel Twist: Drizzle a layer of gluten-free caramel sauce and a pinch of coarse sea salt over the batter just before it goes into the oven.
Conclusion
Baking without gluten does not mean you have to miss out on the rich, comforting treats you love. These Gluten-Free Fudgy Chocolate Brownies prove that safe eating can be absolutely delicious. You can share these treats with confidence, knowing they are safe for your body and satisfying to your sweet tooth.
Please leave a comment below if you try making these at home. Tell us how they turned out, or share your favorite way to serve them to your loved ones.
FAQs Section
Can I use oat flour instead of almond flour? You can use certified gluten-free oat flour, but it will change the texture slightly. Oat flour absorbs more liquid than almond flour, which can make the brownies a bit more cake-like rather than dense and fudgy. If you use oat flour, start with 3/4 cup instead of a full cup to keep them moist.
How do I keep my gluten-free brownies from crumbling? The main trick to preventing crumbling is patience. Gluten-free treats lack the structure that wheat gluten provides, so they are very fragile when they are hot. Letting the brownies cool completely in the baking pan allows the structure to set so you can slice them easily.
Are these brownies quick to prepare? Yes, this recipe comes together very quickly. You only need about 15 minutes to measure out your ingredients and mix the batter. Since you do not need to wait for dough to rise or chill, you can have fresh, warm treats ready in less than an hour.
What are the health benefits of using almond flour? Using almond flour adds healthy fats, protein, and fiber to your dessert. This means these brownies are more filling and will not cause your blood sugar to spike and crash as quickly as treats made with refined white flour.