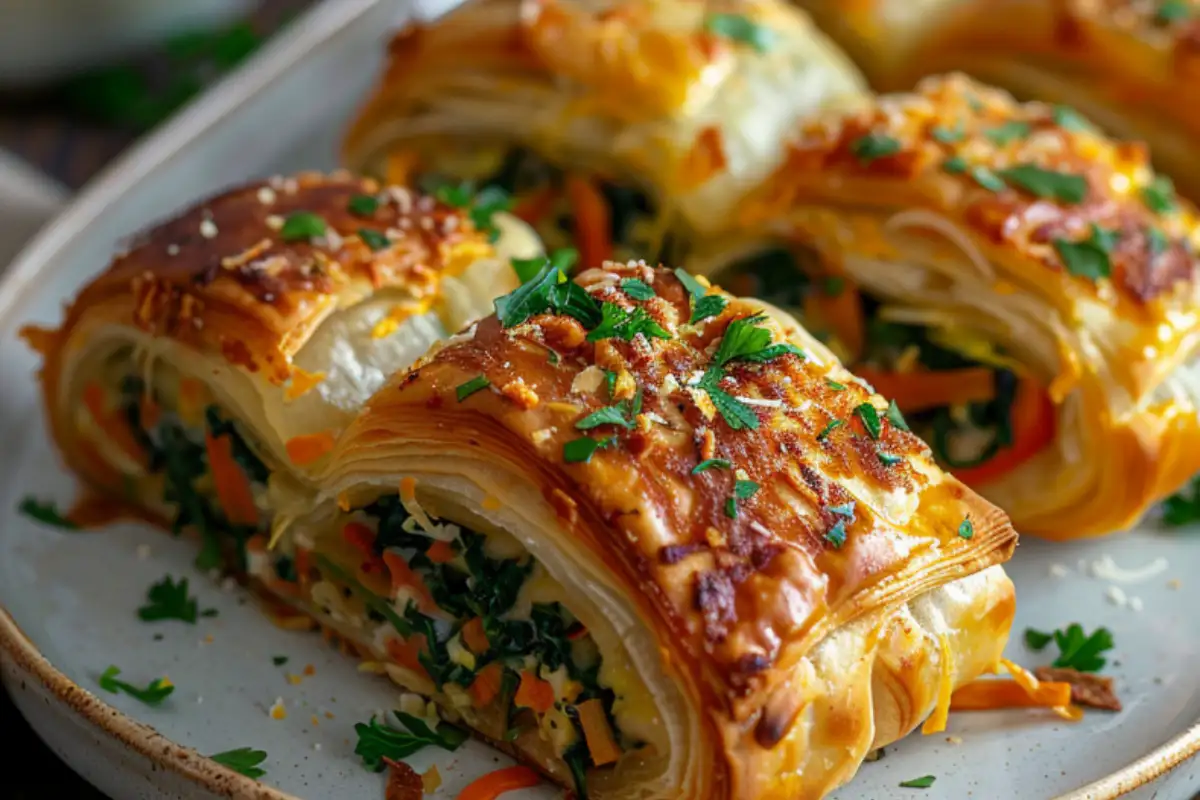
Do you miss the flaky, buttery crunch of a fresh pastry fresh out of the oven? When you have to give up gluten, it can feel like you are saying goodbye to your favorite comfort foods forever. Many gluten-free breads and pastries turn out dense, crumbly, or dry. It can be frustrating to spend time in the kitchen only to end up with a dish that does not satisfy your cravings.
You do not have to settle for less anymore. This recipe gives you that perfect, golden crunch you have been missing. These savory rolls are packed with colorful vegetables and a creamy, rich filling. They taste so good that your whole family will love them, whether they eat gluten-free or not. You are about to discover how easy it is to bring pastry back into your life.
Overview
This recipe is special because it brings back the joy of eating a true pastry. We use clever gluten-free baking tricks to make sure every bite is light, crisp, and full of flavor. You do not need any advanced baking skills to make this happen.
- Difficulty Level: Medium. If you can roll out dough and chop veggies, you can make this recipe.
- Time Required: 20 minutes of preparation time and 25 minutes of baking time.
- Safety Note: This recipe is 100% gluten-free. It is completely safe for people with celiac disease or gluten sensitivity, as long as you choose certified ingredients.
Essential Gluten-Free Ingredients
Using the right ingredients is the secret to great gluten-free baking. Because gluten-free flour behaves differently than wheat flour, exact measurements and certifications matter. Always look for a “Certified Gluten-Free” label on packaged goods to avoid hidden gluten.
Main Ingredients
- Gluten-Free Puff Pastry Sheets: 1 package (approximately 14 ounces), thawed according to package directions. Look for brands like Schär or Gee Free in the freezer section.
- Shredded Carrots: 1 cup, finely grated.
- Fresh Spinach or Cabbage: 2 cups, finely chopped and pressed dry with a paper towel.
- Cream Cheese: 4 ounces, softened at room temperature. Ensure the brand is certified gluten-free.
- Eggs: 2 large eggs (plus 1 extra egg beaten with 1 tablespoon of water for the egg wash).
- Shredded Cheddar or Mozzarella Cheese: 1 cup, divided.
- Salt: 1/2 teaspoon.
- Black Pepper: 1/4 teaspoon.
- Garlic Powder: 1/2 teaspoon.
- Fresh Parsley: 2 tablespoons, finely chopped for garnish.
Flavor and Diet Variations
- Make it Dairy-Free: Substitute the cream cheese and shredded cheese with your favorite dairy-free, plant-based alternatives.
- Add More Veggies: Swap out spinach for finely chopped broccoli florets or sautéed mushrooms. Just ensure they are fully cooked and dry before adding them to the mix.
Step-by-Step Instructions
Gluten-free pastry dough can be delicate. Follow these steps carefully, handle the dough gently, and you will get beautiful results every time.
- Preheat and Prepare: Heat your oven to 400 degrees Fahrenheit. Line a large baking sheet with parchment paper. This prevents sticking and keeps your kitchen safe from gluten cross-contamination if you share a kitchen with gluten-eaters.
- Mix the Filling: In a medium mixing bowl, combine 4 ounces of softened cream cheese, 2 large eggs, 1/2 teaspoon of salt, 1/4 teaspoon of black pepper, and 1/2 teaspoon of garlic powder. Stir until smooth.
- Add the Vegetables and Cheese: Fold in 1 cup of finely grated carrots, 2 cups of chopped spinach, and 1/2 cup of the shredded cheese. Stir until the vegetables are completely coated in the mixture.
- Roll Out the Pastry: Dust a clean surface or a sheet of parchment paper with a little bit of gluten-free starch or flour. Gently unroll your thawed gluten-free puff pastry sheet. If it cracks, simply use warm fingers to press the dough back together.
- Spread the Filling: Spread the vegetable and cheese mixture evenly over the pastry sheet, leaving a 1/2-inch border around all the edges.
- Roll into a Log: Starting from the long edge closest to you, carefully roll the pastry upward into a tight log. Use the parchment paper beneath it to help lift and roll the dough if it feels sticky.
- Slice into Rolls: Use a sharp, serrated knife to gently saw the log into 1-inch thick rounds. Do not press straight down, or you will squish the filling out. Place each roll flat on your prepared baking sheet.
- Brush and Top: Brush the tops and sides of each roll with your beaten egg wash. Sprinkle the remaining 1/2 cup of shredded cheese evenly over the tops of the rolls.
- Bake to Perfection: Bake at 400 degrees Fahrenheit for 22 to 25 minutes. The pastry should puff up and look deep golden-brown, and the cheese on top should be bubbly and slightly caramelized.
- Cool and Garnish: Remove the pan from the oven and let the rolls cool on the baking sheet for 5 minutes. Sprinkle with 2 tablespoons of fresh chopped parsley before serving.
Assembly or Serving Suggestions
These rolls look beautiful when arranged on a large white platter so the colorful vegetable filling stands out. They are excellent for a weekend brunch, a party appetizer, or a light lunch.
To make it a complete meal, try these pairings:
- Serve alongside a crisp, fresh green salad dressed with a simple lemon vinaigrette.
- Pair them with a warm bowl of gluten-free tomato soup for a cozy lunch.
- Offer a small bowl of gluten-free garlic aioli or warm marinara sauce on the side for dipping.
Storage & Make-Ahead Tips
Gluten-free baked goods can dry out faster than traditional baked goods, but these rolls store beautifully if you follow a few simple steps.
- Refrigeration: Place completely cooled leftovers in an airtight container. Store them in the refrigerator for up to 3 days.
- Freezing: You can freeze these rolls before or after baking. To freeze unbaked rolls, place the sliced rounds on a baking sheet in the freezer for 1 hour until firm, then transfer them to a freezer-safe bag for up to 1 month. Bake directly from frozen, adding 5 to 7 extra minutes to the baking time.
- Reheating: To keep the pastry crispy, reheat cooked rolls in the oven or an air fryer at 350 degrees Fahrenheit for 5 to 8 minutes. Avoid using the microwave, as it will make the pastry soft and soggy.
Recipe Variations
You can easily customize this recipe to fit your nutritional goals or seasonal ingredients.
- Boost the Protein: Mix 1/2 cup of cooked, crumbled gluten-free bacon or chopped ham into the vegetable filling.
- Make it Vegan: Use a vegan-certified puff pastry, substitute the eggs with a commercial vegan egg replacer, and use plant-based cheeses.
- Autumn Twist: Swap the spinach and carrots for roasted butternut squash cubes and a pinch of fresh sage for a warm, fall flavor profile.
Conclusion
Eating gluten-free should never mean missing out on the joy of good food. With recipes like these pastry rolls, you can confidently cook dishes that are safe, delicious, and deeply satisfying. Gather your ingredients, give it a try, and enjoy the wonderful smell of fresh pastry baking in your home.
Please leave a comment below to let everyone know how your pastry rolls turned out, or share your favorite vegetable swaps!
FAQs Section
Can I use homemade gluten-free flour instead of store-bought puff pastry?
Puff pastry requires a very specific laminating process with layers of fat to create flakes. Standard gluten-free flour blends will not create the same layers unless you follow a dedicated gluten-free puff pastry recipe. For quick and reliable results, store-bought gluten-free puff pastry sheets work best.
How do I keep the pastry from crumbling when I roll it?
Gluten-free dough lacks the elasticity of wheat dough, which makes it more fragile. Make sure your pastry sheet is completely thawed but still cold to the touch. If it gets too warm, the fat melts and the dough crumbles. Roll it out on parchment paper so you can use the paper to lift and guide the roll without touching the dough too much.
Are these pastry rolls healthy?
Yes, these rolls are a wonderful way to pack more nutrients into your day. They are loaded with vitamins from the fresh spinach and carrots. Because you make them at home, you have total control over the ingredients, keeping them free from artificial preservatives while still enjoying a quick, 45-minute meal.