Have you ever missed the simple joy of pulling a warm, soft, fluffy dinner roll apart at the dinner table? For many people skipping gluten, bread is the hardest thing to give up. So many store-bought gluten-free rolls turn out dry, heavy, or as hard as hockey pucks. It can feel discouraging to feel like you are missing out on your favorite comfort foods. The good news is that you do not have to live without great bread. This recipe will show you how to make perfect, pillowy bread rolls that taste just like the real thing.
Overview
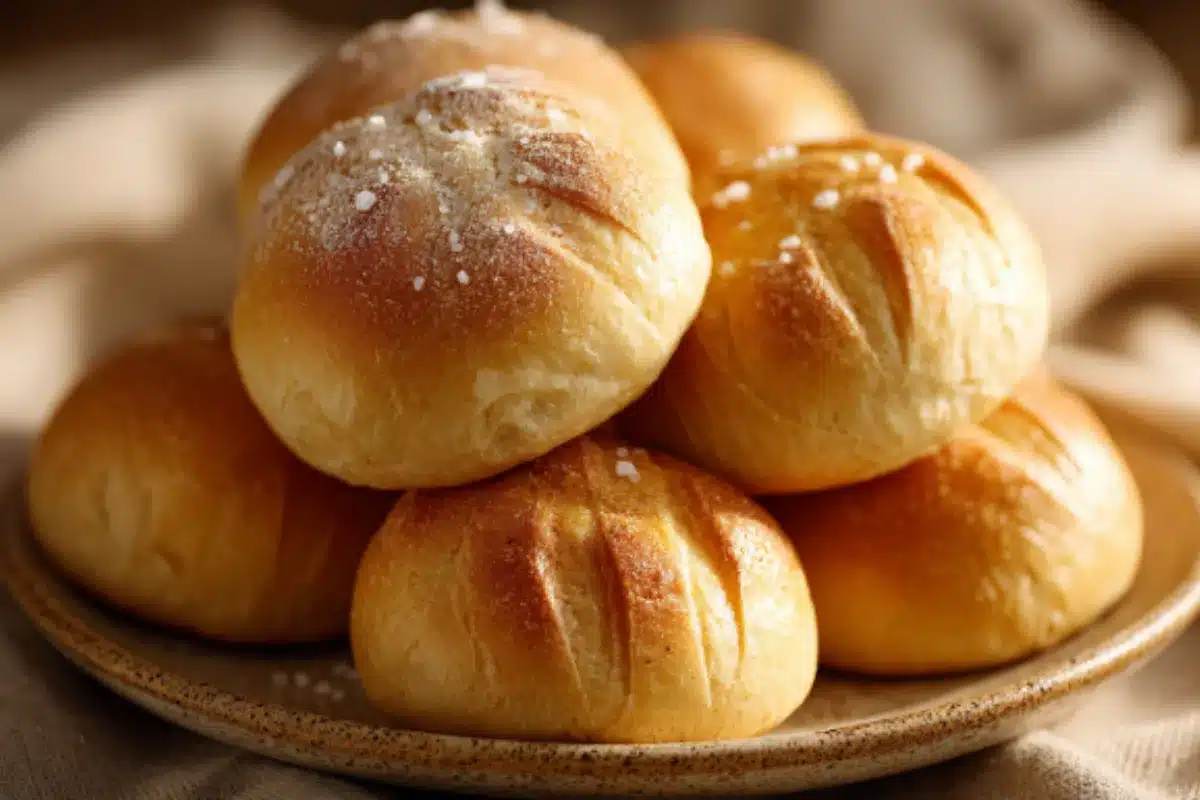
This recipe changes everything for gluten-free baking. These Gluten-Free Bread Rolls are incredibly soft on the inside with a beautiful, slightly crisp golden crust on the outside. They do not crumble into sawdust when you bite into them.
- Time Required: 1 hour and 30 minutes total (30 minutes of hands-on work, 45 minutes for rising, and 15 minutes for baking).
- Difficulty Level: Easy. You do not need any advanced baking skills or special equipment like a heavy stand mixer.
- Safety: This recipe is 100% gluten-free. It is completely safe for people with celiac disease, wheat allergies, or non-celiac gluten sensitivity.
Essential Gluten-Free Ingredients
Gluten-free baking relies on the right combination of ingredients to mimic the chewiness of traditional wheat flour. For the best results, use a kitchen scale to measure these items accurately.
- Gluten-Free Flour Blend (312 grams or 2 1/2 cups): Choose a high-quality 1-to-1 baking flour blend that contains rice flour, potato starch, and tapioca flour. Look for brands clearly labeled “Certified Gluten-Free” to ensure there is no cross-contamination.
- Xanthan Gum (1 teaspoon): If your flour blend does not already include xanthan gum, you must add it. This ingredient replaces the gluten structure and holds the rolls together so they do not crumble.
- Instant Yeast (7 grams or 1 packet): Make sure your yeast is fresh and certified gluten-free. Instant yeast works fast and helps the dough rise beautifully.
- Warm Water (240 milliliters or 1 cup): The water must be warm to the touch, around 105 degrees Fahrenheit. If it is too hot, it will kill the yeast. If it is too cold, the yeast will not wake up.
- Honey or Sugar (25 grams or 2 tablespoons): This feeds the yeast so it can create the gas bubbles that make the bread rise.
- Melted Butter or Neutral Oil (45 grams or 3 tablespoons): This adds moisture and keeps the crumb of the bread soft for days.
- Large Eggs (2 room temperature eggs): Eggs provide structure and lift to gluten-free dough.
- Salt (6 grams or 1 teaspoon): Essential for flavor. Do not skip this, or your bread will taste bland.
Diet Variations
- To Make it Dairy-Free: Use melted coconut oil or your favorite vegan butter alternative instead of dairy butter.
- To Make it Vegan: Substitute the honey with maple sugar, and replace the two eggs with 60 milliliters of aquafaba (the liquid from a can of chickpeas) whipped until frothy.
Step-by-Step Instructions
Follow these numbered steps for perfect rolls every time. Because gluten-free dough is more like a thick cake batter than traditional bread dough, handle it gently.
- Activate the Yeast: In a medium bowl, combine 240 milliliters of warm water, 25 grams of honey, and 7 grams of instant yeast. Stir gently and let it sit for 5 to 10 minutes. The mixture should become frothy and smell like beer. If it does not bubble, your yeast is dead and you need to start over with fresh yeast.
- Mix the Dry Ingredients: In a large mixing bowl, whisk together 312 grams of gluten-free flour blend, 1 teaspoon of xanthan gum (if needed), and 6 grams of salt.
- Combine Wet and Dry: Pour the bubbly yeast mixture, 45 grams of melted butter, and 2 room temperature eggs into the bowl with the dry ingredients. Stir vigorously with a wooden spoon or a silicone spatula for about 3 to 4 minutes. The dough will be very sticky and thick, resembling a thick cookie dough rather than a kneadable wheat dough.
- Shape the Rolls: Grease a 9×13-inch baking pan with a little extra oil or butter. Oil your hands generously to prevent sticking. Scoop out equal portions of dough and gently roll them into 8 smooth balls. Place the balls in the prepared pan, leaving a little space between each one.
- Let it Rise: Cover the pan loosely with a clean, damp kitchen towel. Place the pan in a warm, draft-free spot in your kitchen. Let the rolls rise for 45 minutes, or until they have nearly doubled in size and are touching each other.
- Preheat the Oven: While the rolls are completing their rise, preheat your oven to 400 degrees Fahrenheit.
- Bake: Remove the towel and place the pan on the center rack of the oven. Bake for 15 to 18 minutes. The tops should turn a deep golden brown.
- Cool: Remove the rolls from the oven. Brush the tops with a little extra melted butter if you like a soft crust. Let them cool in the pan for 10 minutes before moving them to a wire rack.
Tips for Success
- To avoid cross-contamination in a kitchen that also uses wheat, use clean utensils, fresh parchment paper, and a dedicated gluten-free cutting board.
- Do not try to knead this dough on a counter. Gluten-free dough needs moisture to stay soft, so it must remain sticky.
Assembly or Serving Suggestions
These rolls are best served warm straight from the oven when they are at their peak fluffiness. Place them in a fabric-lined basket to keep them warm during dinner.
- The Classic Spread: Serve these rolls alongside a small dish of salted dairy-free butter or a dish of olive oil mixed with dried Italian herbs for dipping.
- Meal Pairings: These Gluten-Free Bread Rolls pair wonderfully with a hot bowl of homemade tomato soup, a fresh garden salad, or as the perfect side dish for a holiday roast dinner.
Storage & Make-Ahead Tips
Gluten-free bread goes stale faster than wheat bread because it lacks gluten to lock in moisture. Proper storage keeps them delicious.
- Room Temperature: Store cooled leftover rolls in an airtight container or a zip-top bag for up to 2 days.
- Freezing Instructions: For longer storage, freeze the rolls on the day they are baked. Let them cool completely, wrap each roll tightly in plastic wrap, and place them all in a freezer-safe bag. They will keep well for up to 3 months.
- Reheating: To revive that fresh-baked texture, sprinkle a frozen or room-temperature roll with a few drops of water. Wrap it loosely in paper towel and microwave for 15 to 20 seconds, or heat it in a 350-degree Fahrenheit oven for 8 minutes until warm through the center.
Recipe Variations
You can easily customize this base dough to fit different occasions or flavor profiles.
- Garlic and Herb Rolls: Mix 1 teaspoon of garlic powder, 1 teaspoon of dried rosemary, and 1 teaspoon of dried thyme into the dry flour blend before mixing.
- Cinnamon Raisin Rolls: Omit the savory elements. Add 2 tablespoons of brown sugar, 1 teaspoon of ground cinnamon, and 50 grams of raisins to the dough for a sweet breakfast treat.
- Seed-Topped Rolls: Before baking, brush the risen dough balls with a simple egg wash (one egg beaten with one tablespoon of water) and sprinkle the tops with sesame seeds, poppy seeds, or everything bagel seasoning.
Conclusion
Baking without gluten does not mean you have to give up the comforting smell of fresh bread filling your home. With this simple recipe, you can confidently bake rolls that your entire family will love, whether they eat gluten-free or not. You deserve to enjoy delicious food that makes your body feel good.
Please leave a comment below to share how your rolls turned out, or let us know your favorite ways to serve them.
FAQs Section
Can I use oat flour or almond flour instead of a gluten-free blend? No. Single-grain flours like oat flour or almond flour behave very differently than wheat flour. This recipe requires a balanced 1-to-1 gluten-free baking blend that mimics wheat flour structure. Using only almond flour will result in flat, greasy rolls that do not rise.
How do I keep my gluten-free rolls from crumbling? The secret to stopping the crumble is xanthan gum. It acts like a glue to bind the ingredients together in place of gluten. Always check that your store-bought flour blend includes it, or add it separately as instructed.
Can I make this dough the night before? Yes. You can shape the rolls, place them in the baking pan, cover them tightly with plastic wrap, and store them in the refrigerator overnight. In the morning, let the pan sit on the kitchen counter for about 30 to 45 minutes to lose the chill and finish rising before you pop them into the preheated oven.
Is this recipe healthy? These rolls provide a safe, easily digestible alternative for anyone who suffers from digestive issues caused by gluten. Making bread at home also means you avoid the artificial preservatives, stabilizers, and high amounts of extra sugar often found in commercial grocery store gluten-free breads.